- How to choose surface roughness?
Answer: The selection of surface roughness must not only meet the functional requirements of the part surface, but also consider the economy of processing.
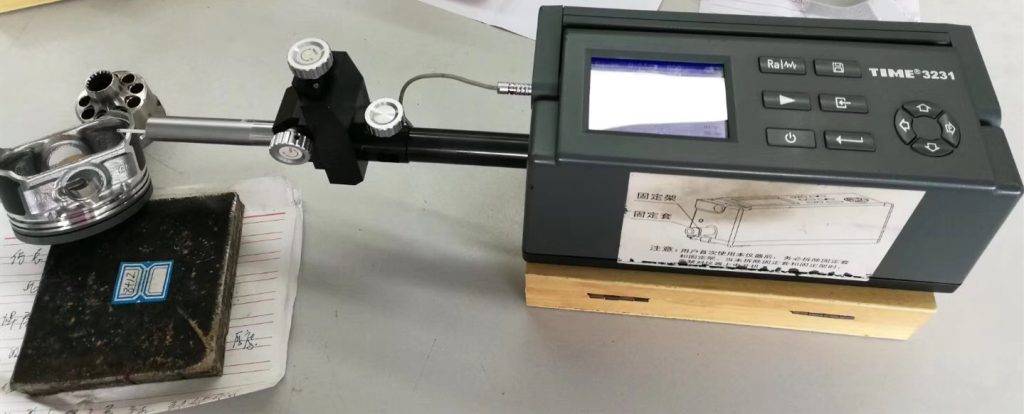
38. When using the analogy method to determine surface roughness, what are the general principles for selecting height parameters?
Answer: On the same part, the surface roughness value of the working surface should be smaller than that of the non-working surface. The surface roughness value of the friction surface should be smaller than the non-friction surface; the surface roughness value of the rolling friction surface should be smaller than the sliding friction surface; the surface roughness value of high movement speed and large unit pressure should be small. The surface roughness value of the surface subject to cyclic load and the parts easily causing stress concentration (such as fillets and grooves) should be selected smaller. Combining surfaces with high requirements for mating properties, mating surfaces with small mating gaps, and interference mating surfaces that require reliable connections and are subject to heavy loads should all have smaller surface roughness values. With the same fit properties, the smaller the size of the part, the smaller its surface roughness value should be. For the same accuracy level, the surface roughness value of small size and shaft is smaller than that of large size and hole. For the mating surface, its dimensional tolerance, shape tolerance, and surface roughness should be coordinated, and generally there is a certain corresponding relationship.
- When the surface roughness Ra is 50-100μm, what are the characteristics of the surface shape and how to apply it?
Answer: The surface shape is characterized by obvious tool marks. It is used on rough machined surfaces and is generally rarely used. Casting, forging and gas cutting blanks can meet this requirement.
40. When the surface roughness Ra is 25μm, what are the characteristics of the surface shape and how to apply it?
Answer: The surface shape is characterized by visible tool marks, which is applied to rough machined surfaces and is generally rarely used. Casting, forging and gas cutting blanks can meet this requirement.
41. When the surface roughness Ra is 12.5μm, what are the characteristics of the surface shape and how to apply it?
Answer: The surface shape is characterized by micro knife marks. It is used in the first level of rough machining, which has a wide range of applications, such as shaft end surfaces, chamfers, surfaces of screw holes and rivet holes, contact surfaces of washers, etc.
- When the surface roughness Ra is 6.3μm, what are the characteristics of the surface shape and how to apply it?
Answer: Surface shape features are visible machining marks, which are applied to semi-rough machined surfaces, non-contact free surfaces such as brackets, boxes, clutches, pulley sides, cam sides, surfaces in contact with bolt heads and rivet heads, all shafts and The undercut of the hole, the joint surface of the general cover, etc.
43. When the surface roughness Ra is 3.2μm, what are the characteristics of the surface shape and how to apply it?
Answer: The surface shape is characterized by micro machining marks. It is applied to semi-finished surfaces, surfaces such as boxes, brackets, covers, sleeves, etc. that are connected to other parts without matching requirements, surfaces that need to be blue, and knurling. Pre-machined surfaces, all non-contact outer surfaces of the spindle, etc. It is a surface roughness value that can be achieved more economically by basic cutting processing methods such as turning.
- When the surface roughness Ra is 1.6μm, what are the characteristics of the surface shape and how to apply it?
Answer: The surface shape is characterized by unclear processing marks. It is used for surfaces with high surface quality requirements, medium-sized machine tool worktables (ordinary precision), combined machine tool spindle boxes and cover surfaces, medium-sized flat pulleys and triangle pulleys. The working surface, the pressing hole of the bushing sliding bearing, and the journal that generally rotates at low speed. Non-fitting surfaces of some important parts of aviation and aerospace products.
- When the surface roughness Ra is 0.8μm, what are the characteristics of the surface shape and how to apply it?
Answer: The surface shape feature is the direction in which machining traces can be discerned. It is used in medium-sized machine tools (normal precision) sliding guide surfaces, guide rail pressure plates, surfaces of cylindrical pins and conical pins, general precision dials, and outer surfaces that require chrome plating and polishing. Rapidly rotating journal, positioning pin press-in hole, etc. It is a commonly used value for mating surfaces and is an important mating point for medium and heavy equipment. It is economical to grind.
- When the surface roughness Ra is 0.4μm, what are the characteristics of the surface shape and how to apply it?
Answer: The surface shape feature is the direction of micro-discrimination of machining marks, which is used in medium-sized machine tools (to improve accuracy) sliding guide surfaces, working surfaces of sliding bearings, main surfaces of fixture positioning elements and drill bushings, working journals of crankshafts and camshafts, The surface of the indexing plate, the working surface of the journal and bushing under high-speed operation, etc.
- When the surface roughness Ra is 0.2μm, what are the characteristics of the surface shape and how to apply it?
Answer: The surface shape is characterized by the direction of indiscernible machining traces. It is used in precision machine tool spindle taper holes and apex conical surfaces; the joint surface of small-diameter precision mandrels and rotating shafts, and the piston pin holes of pistons, which require airtight surfaces and supports. noodle. The leaf basin and the back side of the aero-engine blade.

